Launch a Google Cloud GPU VM and Run CUDA in Under 10 Minutes
Modern GPU computing shouldn’t demand a complex local setup or expensive hardware. With Google Cloud, you can spin up an NVIDIA Tesla T4 GPU in minutes, connect straight from VS Code, and run your first CUDA kernel instantly — no fuss, no surprises on your bill. This hands-on guide shows you exactly how.
Why Use Google Cloud for CUDA Development?
Local GPUs are great, but they come with driver headaches, heat, and upfront costs. A cloud GPU lets you pay only for the minutes you compute. Google Cloud’s Deep Learning VM images come with CUDA and Python pre-installed, so you can jump straight to development or prototyping.
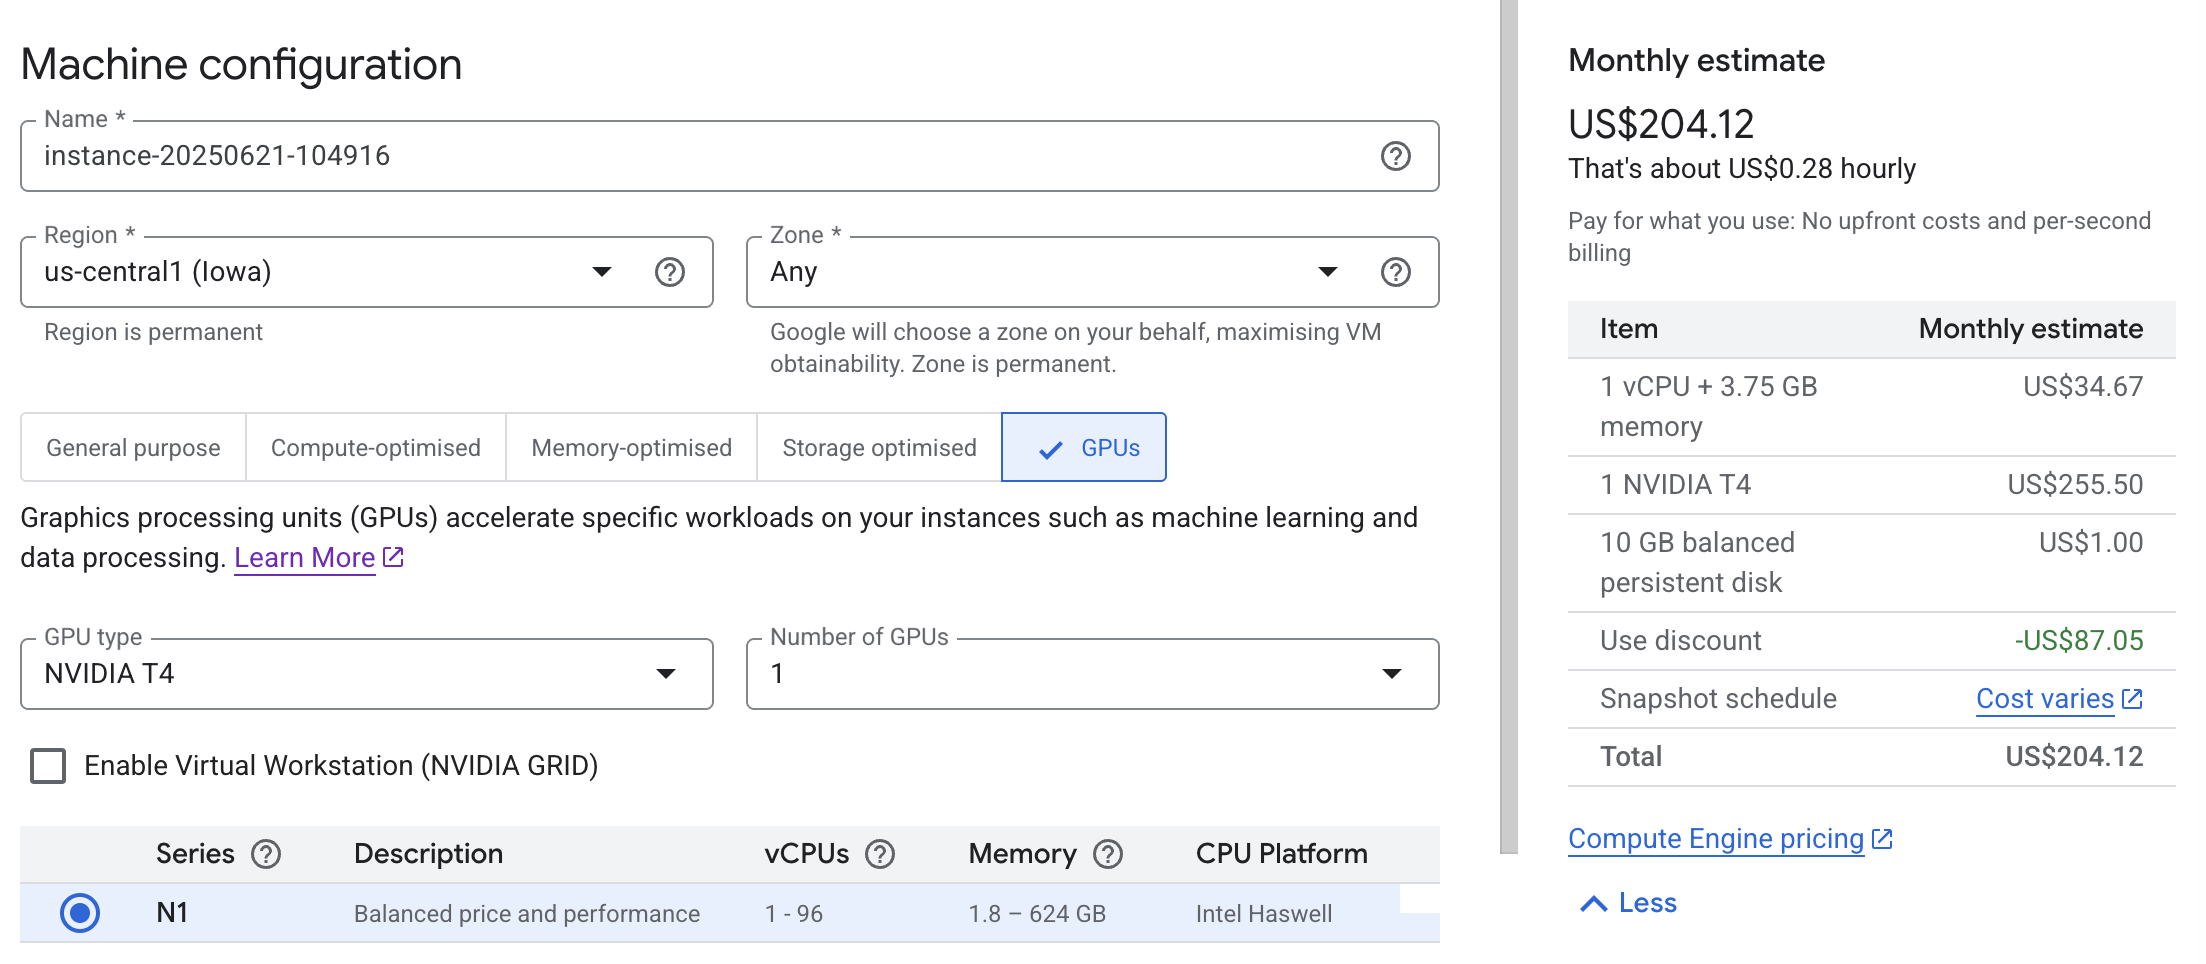
Step 1 — Provision a GPU VM in One Command
Run the following gcloud command in your terminal to create a ready-to-go Debian instance with a single Tesla T4 GPU and CUDA 12.4:
1
2
3
4
5
6
7
8
9
10
11
12
13
14
15
16
gcloud compute instances create instance-20250621-104916 \
    --project=stellar-code-463213-j7 \
    --zone=us-central1-f \
    --machine-type=n1-standard-1 \
    --network-interface=network-tier=PREMIUM,stack-type=IPV4_ONLY,subnet=default \
    --maintenance-policy=TERMINATE \
    --provisioning-model=STANDARD \
    --service-account=763520523216-compute@developer.gserviceaccount.com \
    --scopes=https://www.googleapis.com/auth/devstorage.read_only,https://www.googleapis.com/auth/logging.write,https://www.googleapis.com/auth/monitoring.write,https://www.googleapis.com/auth/service.management.readonly,https://www.googleapis.com/auth/servicecontrol,https://www.googleapis.com/auth/trace.append \
    --accelerator=count=1,type=nvidia-tesla-t4 \
    --create-disk=auto-delete=yes,boot=yes,device-name=instance-20250621-104916,image=projects/ml-images/global/images/c0-deeplearning-common-cu124-v20250325-debian-11-py310-conda,mode=rw,size=50,type=pd-balanced \
    --no-shielded-secure-boot \
    --shielded-vtpm \
    --shielded-integrity-monitoring \
    --labels=goog-ec-src=vm_add-gcloud \
    --reservation-affinity=any
Once the VM spins up, grab its External IP from your Google Cloud Console.
Step 2 — Connect Seamlessly with VS Code Remote SSH
First, verify SSH works from your local terminal:
1
gcloud compute ssh instance-20250621-104916 --zone us-central1-f
For a smoother experience, set up your ~/.ssh/config for instant VS Code access:
1
2
3
4
Host cuda-lab
  HostName <EXTERNAL_IP>
  User <YOUR_GCP_USERNAME>
  IdentityFile ~/.ssh/google_compute_engine
In VS Code:
- Install the Remote - SSH extension (if you haven’t already).
- Open the Remote Explorer.
- Click Connect to Host →
cuda-lab.
You’ll get a full terminal and code editor — no local compiler required.
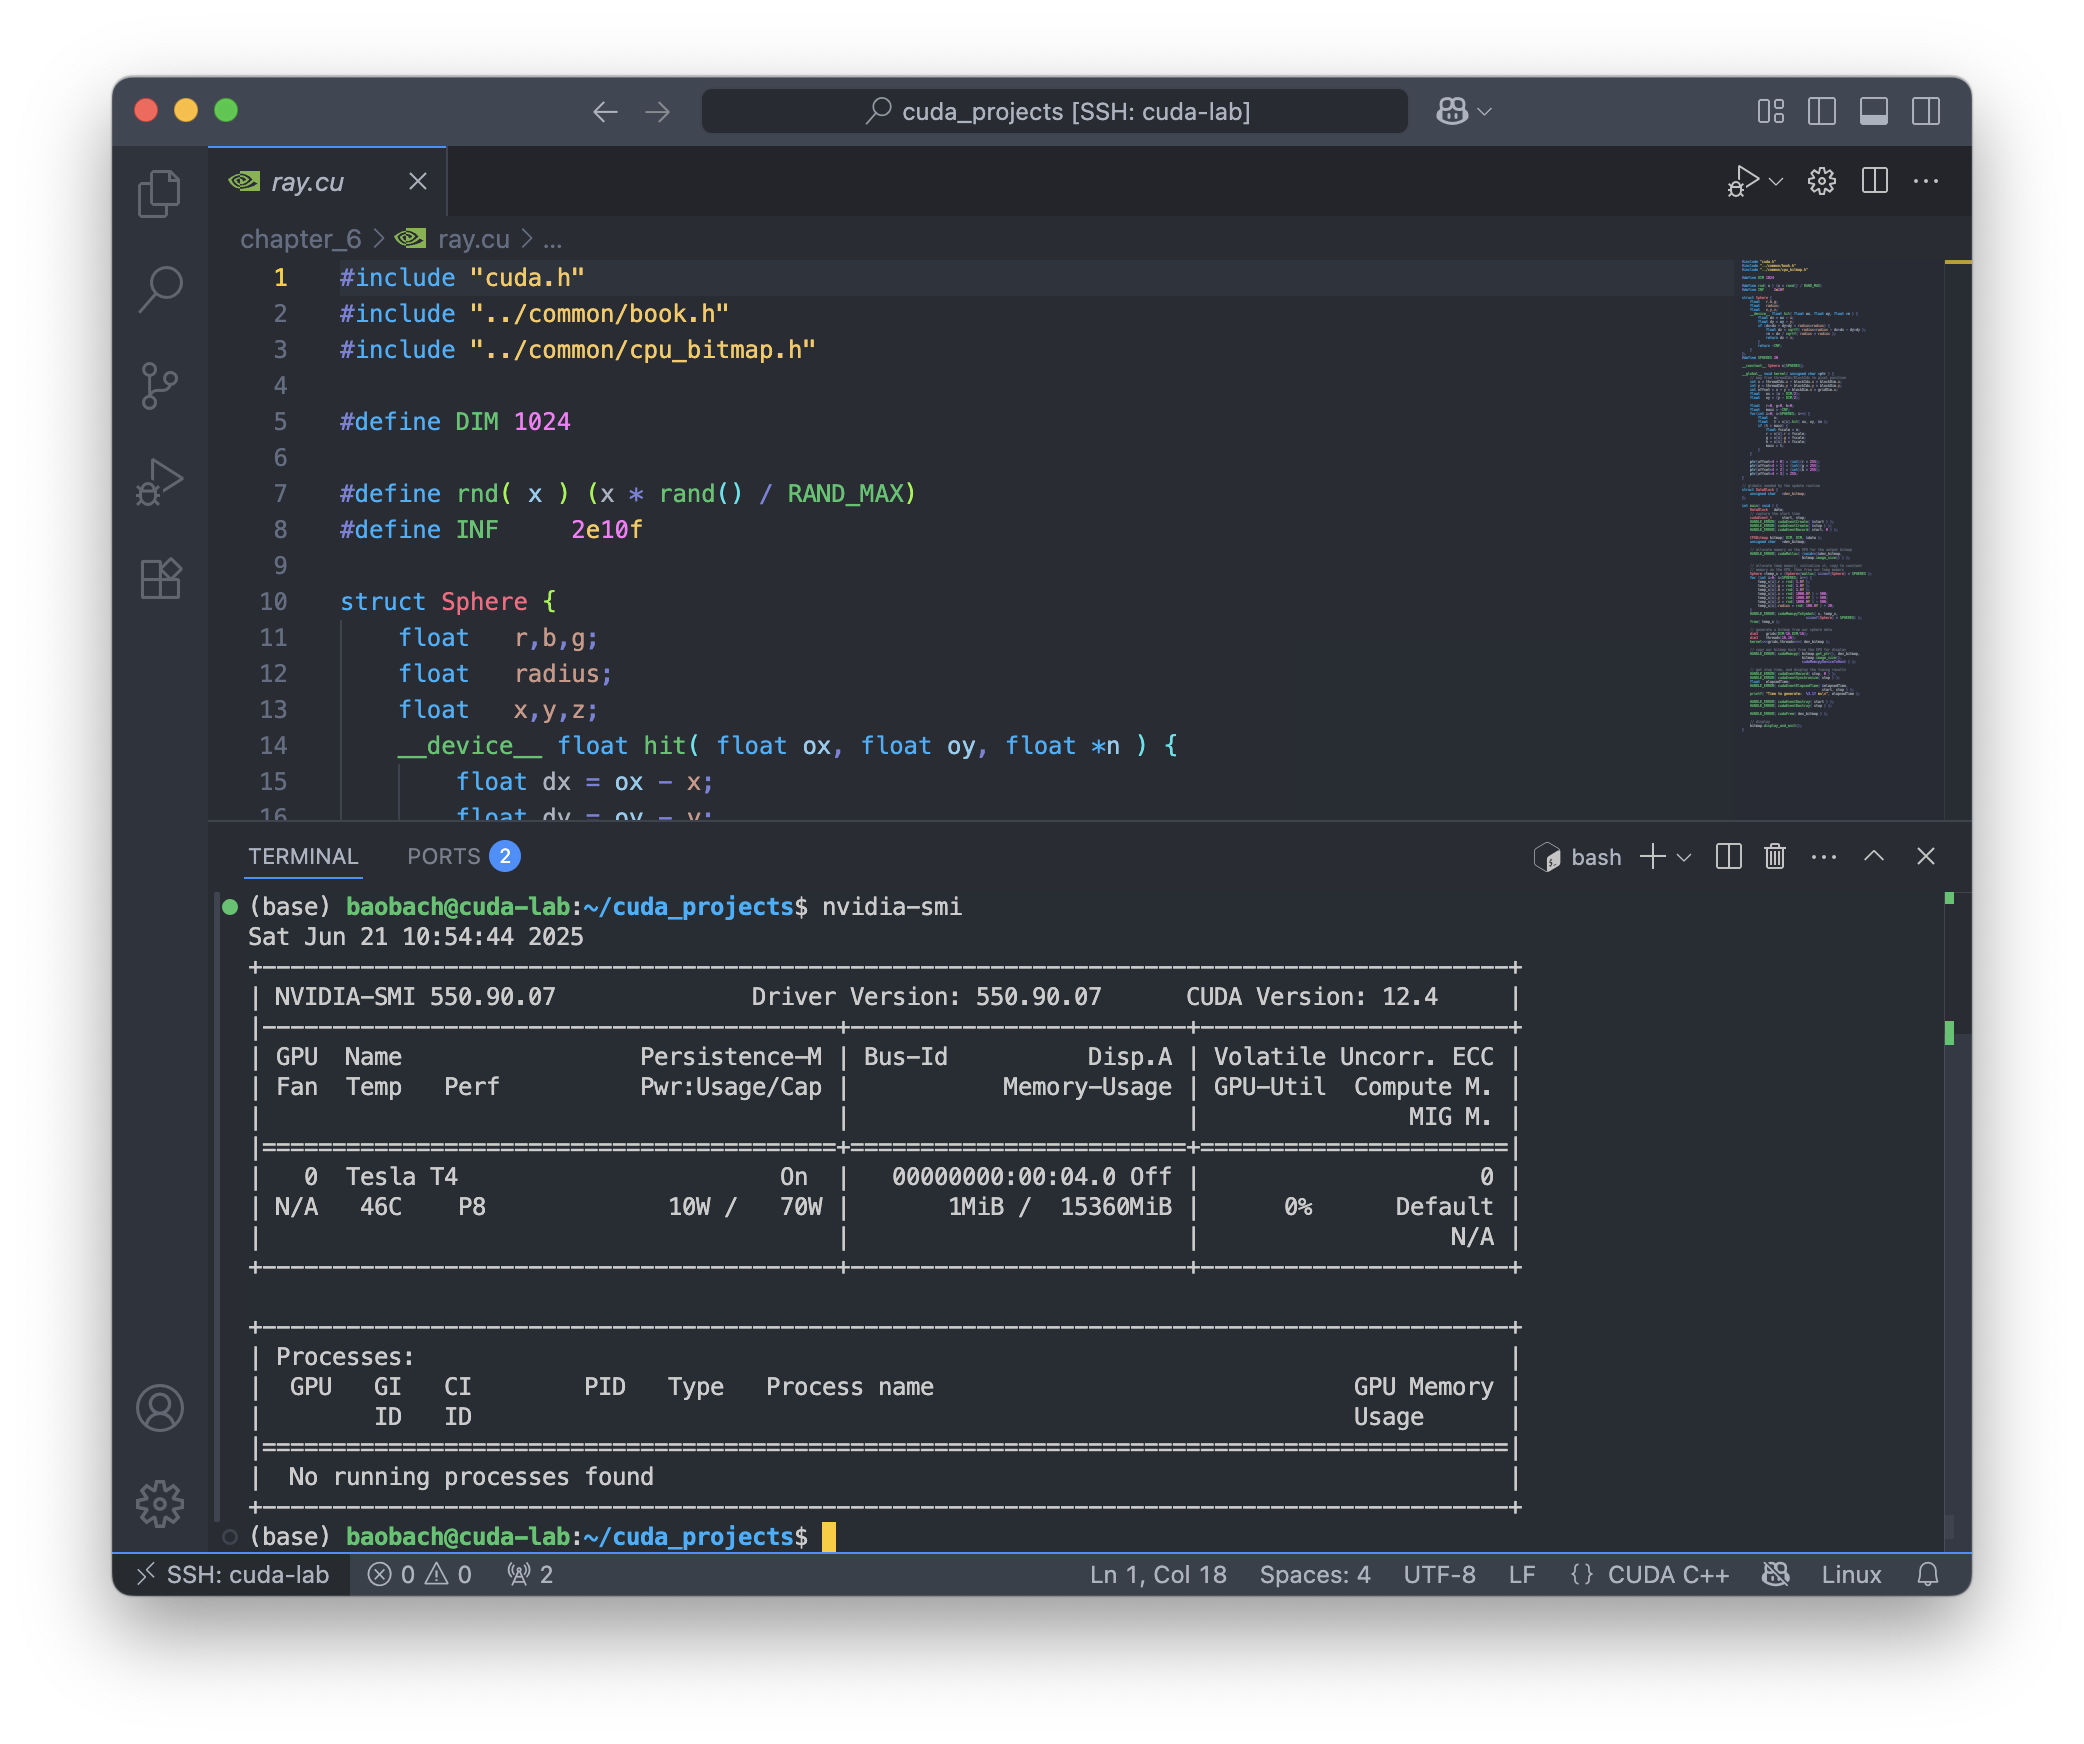
Confirm the GPU is online:
1
nvidia-smi
You should see your Tesla T4 listed along with driver and CUDA version.
Step 3 — Write, Compile, and Run Your First CUDA Program
Let’s verify that your cloud GPU actually works. Save this simple vector addition kernel as add_vector.cu in your home directory:
1
2
3
4
5
6
7
8
9
10
11
12
13
14
15
16
17
18
19
20
21
22
23
24
25
26
27
28
29
30
31
32
33
34
35
36
37
38
39
40
41
42
43
44
45
46
47
48
49
50
51
52
53
54
55
56
57
#include "../common/book.h"

#define N (32 * 1024)

// CUDA kernel for vector addition
__global__ void add(int *a, int *b, int *c) {
  int tid = blockIdx.x;
  while (tid < N) {
    c[tid] = a[tid] + b[tid];
    tid += gridDim.x;
  }
}

int main(void) {
  int *a, *b, *c;
  int *dev_a, *dev_b, *dev_c;

  a = (int*)malloc(N * sizeof(int));
  b = (int*)malloc(N * sizeof(int));
  c = (int*)malloc(N * sizeof(int));

  HANDLE_ERROR(cudaMalloc((void**)&dev_a, N * sizeof(int)));
  HANDLE_ERROR(cudaMalloc((void**)&dev_b, N * sizeof(int)));
  HANDLE_ERROR(cudaMalloc((void**)&dev_c, N * sizeof(int)));

  for (int i = 0; i < N; i++) {
    a[i] = i;
    b[i] = 2 * i;
  }

  HANDLE_ERROR(cudaMemcpy(dev_a, a, N * sizeof(int), cudaMemcpyHostToDevice));
  HANDLE_ERROR(cudaMemcpy(dev_b, b, N * sizeof(int), cudaMemcpyHostToDevice));

  add<<<128,1>>>(dev_a, dev_b, dev_c);

  HANDLE_ERROR(cudaMemcpy(c, dev_c, N * sizeof(int), cudaMemcpyDeviceToHost));

  bool success = true;
  for (int i = 0; i < N; i++) {
    if ((a[i] + b[i]) != c[i]) {
      printf("Error: %d + %d != %d\n", a[i], b[i], c[i]);
      success = false;
    }
  }

  if (success) printf("We did it!!!\n");

  HANDLE_ERROR(cudaFree(dev_a));
  HANDLE_ERROR(cudaFree(dev_b));
  HANDLE_ERROR(cudaFree(dev_c));

  free(a);
  free(b);
  free(c);

  return 0;
}
Compile and run it:
1
2
nvcc -o add_vector add_vector.cu
./add_vector
If everything works, you’ll see:
1
We did it!!!
Step 4 — Control Your GPU Costs
Remember: Cloud GPUs cost money only while your VM is running. So, stop your instance when not needed:
1
gcloud compute instances stop instance-20250621-104916 --zone us-central1-f
When you’re ready to work again:
1
gcloud compute instances start instance-20250621-104916 --zone us-central1-f
💡 **Tip:** To keep the same external IP between restarts, reserve a static IP address. It costs about \$7/month in `us-central`, but it avoids SSH reconnections breaking due to changing IPs.
Bonus — Run CUDA GUI Apps Remotely
Want to run OpenGL demos or CUDA visual tools on your local Mac? Use X11 forwarding:
Install XQuartz:
1
brew install --cask xquartz
- Open XQuartz → Preferences → Security → check Allow connections from network clients.
SSH with X11:
1
ssh -Y <your_vm_username>@<EXTERNAL_IP>
Test it:
1
2
echo $DISPLAY
xeyes
Final Thoughts
You’ve just built a flexible, pay-as-you-go CUDA dev environment in minutes — no driver nightmares, no hardware lock-in. Keep it idle when you don’t need it, restart when inspiration strikes, and push your CUDA experiments straight from VS Code.
Happy computing — and may your kernels always run fast and bug-free!